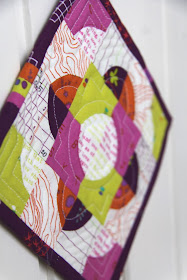
Six and a half inches... yes, I really said six and a half inches of drunkard's path mini-ness! That's what I've been working on these days, and I wanted to share how I made such a tiny little drunkard's path block WITHOUT ANY CURVED PIECING!
Wait just a minute... I thought that a drunkard's path block is done using a curved piecing technique? Well, yes, traditionally, but if you intend to work with individual blocks that are only 2 inches (5 cm), then you have to think a little outside the box. Curved piecing is hard enough to do, but if you want to super shrink your block it is nearly impossible, so an alternative method is an absolute must, and I'll show you just how I did it using the reverse applique method:
So to start out, grab a couple of supplies that you hopefully already have in your sewing room: Compass, freezer paper, fabric, glue stick, scissors, and invisible thread. It's time for a little grade school 101 cutting. For my circle, I measured out 1 1/4 inches (3,15 cm), which will give me a 2 1/2 inch (6,30cm) finished circle. Trace onto the mat side of your freezer paper, and cut out the inner circle.
Iron the circle, glossy side down, to the wrong side of a 5 inch (12,5 cm) fabric square, making sure that the inner circle is centered. Cut out the center leaving a 1/4 inch (6mm) seam allowance. Once the inner circle is cut out, then cut slits along the seam allowance about 1/4 inch (6mm) apart.
Just like I've shared in some of my previous freezer paper applique tutorials, run a small line of glue around the circles edge, and using small scissors or other turning tool, wrap the fabric notches to the back side of the circle.
Once your circle is completed, stitch the circle onto a background fabric of your choice as close the edge of the circle as possible. I used invisible thread for two reasons: It does not show up very easily, and I don't have to change out threads with each new block.
Remove the freezer paper from the back side and iron flat. Once you have finished the circle, here comes the part that is a little bit scary. Measure out your center and cut the circle into four equal quarters. Next, trim to 2 inch (5 cm) blocks.
Make as many as you would like and then you are now ready to assemble the blocks into your favorite drunkard's path block. I was inspired by the Arabian Nigihts Quilt as seen in Angela Pingel's book, A Quilter's Mixology: Shaking Up Curved Piecing: 16 Projects Using the Drunkard's Path Block.
Have you tried traditional curved piecing methods? What was your take on it... love it and enjoy the challenge or was is frustrating and annoying?
Linking up this week to WIP Wednesday and Let's Bee Social.


Great tutorial for reverse applique of circles! This will really come in handy with all my minis. Thank you for sharing your secret! I have try this out now!
ReplyDeleteGreat tutorial with a fantastic result! Congratulations :)
ReplyDeleteI love this idea! I'll definitely be pinning it for reference in an upcoming project.
ReplyDeleteYou are kidding me?! Great tutorial and how clever! One of my favorite mini mini's for sure!
ReplyDeleteHow clever! And beautiful! :)
ReplyDeleteLove the result you have with this and a great tutorial .... if I was ever contemplating a teeny tiny drunkard's path!!!
ReplyDeleteWonderful tutorial, thank you. Love the pretty and bright fabrics.
ReplyDeleteWhat a great tutorial! And a fabulous mini drunkard's path block with gorgeous fabrics! Super!
ReplyDeleteAdorable!! You are very brave & clever to attempt this!!
ReplyDeleteVery nice! Thanks for sharing!
ReplyDeleteI am absolutely going to try this!! Thank you! I've never used freezer paper in this way before, but I think it's now officially TIME. Yay mini mini fever!
ReplyDeleteLovely tutorial! You make it sound so easy :)
ReplyDeleteBeautiful tutorial!
ReplyDeleteThanks for all of the pictures. Working tiny is a challenge for me but the mini minis do have an appeal
ReplyDeleteBrilliant!!!
ReplyDeleteThis is completely intriguing. I saw in a different post that you moisten the freezer paper for removal. Will there be any bits of the paper remaining on the piece after this process? Many thanks for the fabulous tutorial!
ReplyDeleteWonderful tutorial. I love finding easy ways to sew. x
ReplyDeleteHi Michelle,
ReplyDeleteFor freezer paper removal, you generally do moisten it first since it makes it so much easier. Since this is a reverse appliqué which is essentially freezer paper in reverse, so to say, the paper is on the outside instead of being on the inside. I have not really found there to be lots of bits afterwards… at least not any more that paper piecing. Hope you enjoy this technique… it’s a favorite of mine!