Usually this time of year, there is a certain deep grey that seems to settle and hover over Northern Germany... a kind of grey that is thick. When you know what to expect, it somehow makes it a little easier to come to terms with the inevitable. Despite the fact that I know the looming forecast, it's still a little hard to plan my photos around it. Last week was the first break in the dreary covering since the New Year, and the clear skies were accompanied with a light dusting of snow.
In any case, don't you think it is a little ironic that I am sharing my Summer Smoothie quilt finish in this wintry weather backdrop? Perhaps the slight dusting provides the best contrast for these popping summer colors. I chose to finish it with simple straight line quilting.
Even though the backing is still technically pieced, it's only two pieces compared to my usual let's-piece-half-a-quilt-for-the-back standard. I've had this paintbrush fabric in my head for a backing pretty much since I figured out this quilt's color direction.
Here you can really see the backing fabric from Carrie Bloomston... I adore this border print of hers that she came out with a few years ago.
Since my quilts are usually pretty bright, I've found myself reaching more and more for a neutral binding fabric. There are plenty of coordinating or contrasting fabrics that would work well with this quilt, but I prefer the focus to be on the blocks themselves. A scrappy low volume binding keeps it quiet while using up scraps... that's a win, win in my book!
... and last, but not least, I have to send out a really big thank you to my fellow quilting bee members who contributed to this quilt. #quiltycircleofbees #quiltyfriendsarethebest.
Quilt:
Pattern: Summer Smoothie Quilt from Allison
Richter for Campbell Soup Diary, free tutorial Started: April 2017 Bee Quilt, Quilty Circle of Bees Fabrics: Alison Glass, Carolyn Friedlander, Zen Chic, Carrie Bloomston, Cotton & Steel, various scraps, and low volume backgrounds. Finished quilt size: ca. 56" x 70" in. (ca. 142 x 178 cm)
The last of my blocks from my bee members have finally come in, which means that now it's my part to finish up and add the rest of applique blocks. I realize that usually you ask your bee members to make something other than a simple star block, but I wanted concentrate on the applique part of this quilt, and let the others take care of the piecing.
My original intent was to do a two color quilt, i.e. yellow and white. But I think the subtleness of the transition between the yellow and chartreuse tones, are enough to give a little contrast, while still leaving the feeling of a two color quilt. To my surprise, I keep grabbing for this soft grey these days in my projects, and I love that it is not so obvious in the blocks.
But, now to move onto the fun part: I've been working on several more YouTube videos, and I've just added the one that you may have been waiting for... the actual How-To video!?! In my previous videos, I talked a lot about set-up, supplies, freezer paper, making templates, which are all pretty foundational to the "doing" part of starch applique.
If you happened to miss it, I will be teaching a class in Hamburg next weekend. Join me if you can. Find all the details here.
Some of my bee members like to make fun of me that by the time I deicde on a quilt block, and make up a couple test blocks, that the quilt is almost finished. Well... not quite. Yes, I've made a good amount of progress on my yellow quilt, but am no where near being finished. My bee members will be pleased to know that I am stopping with stars now, and passing the torch for them to carry.
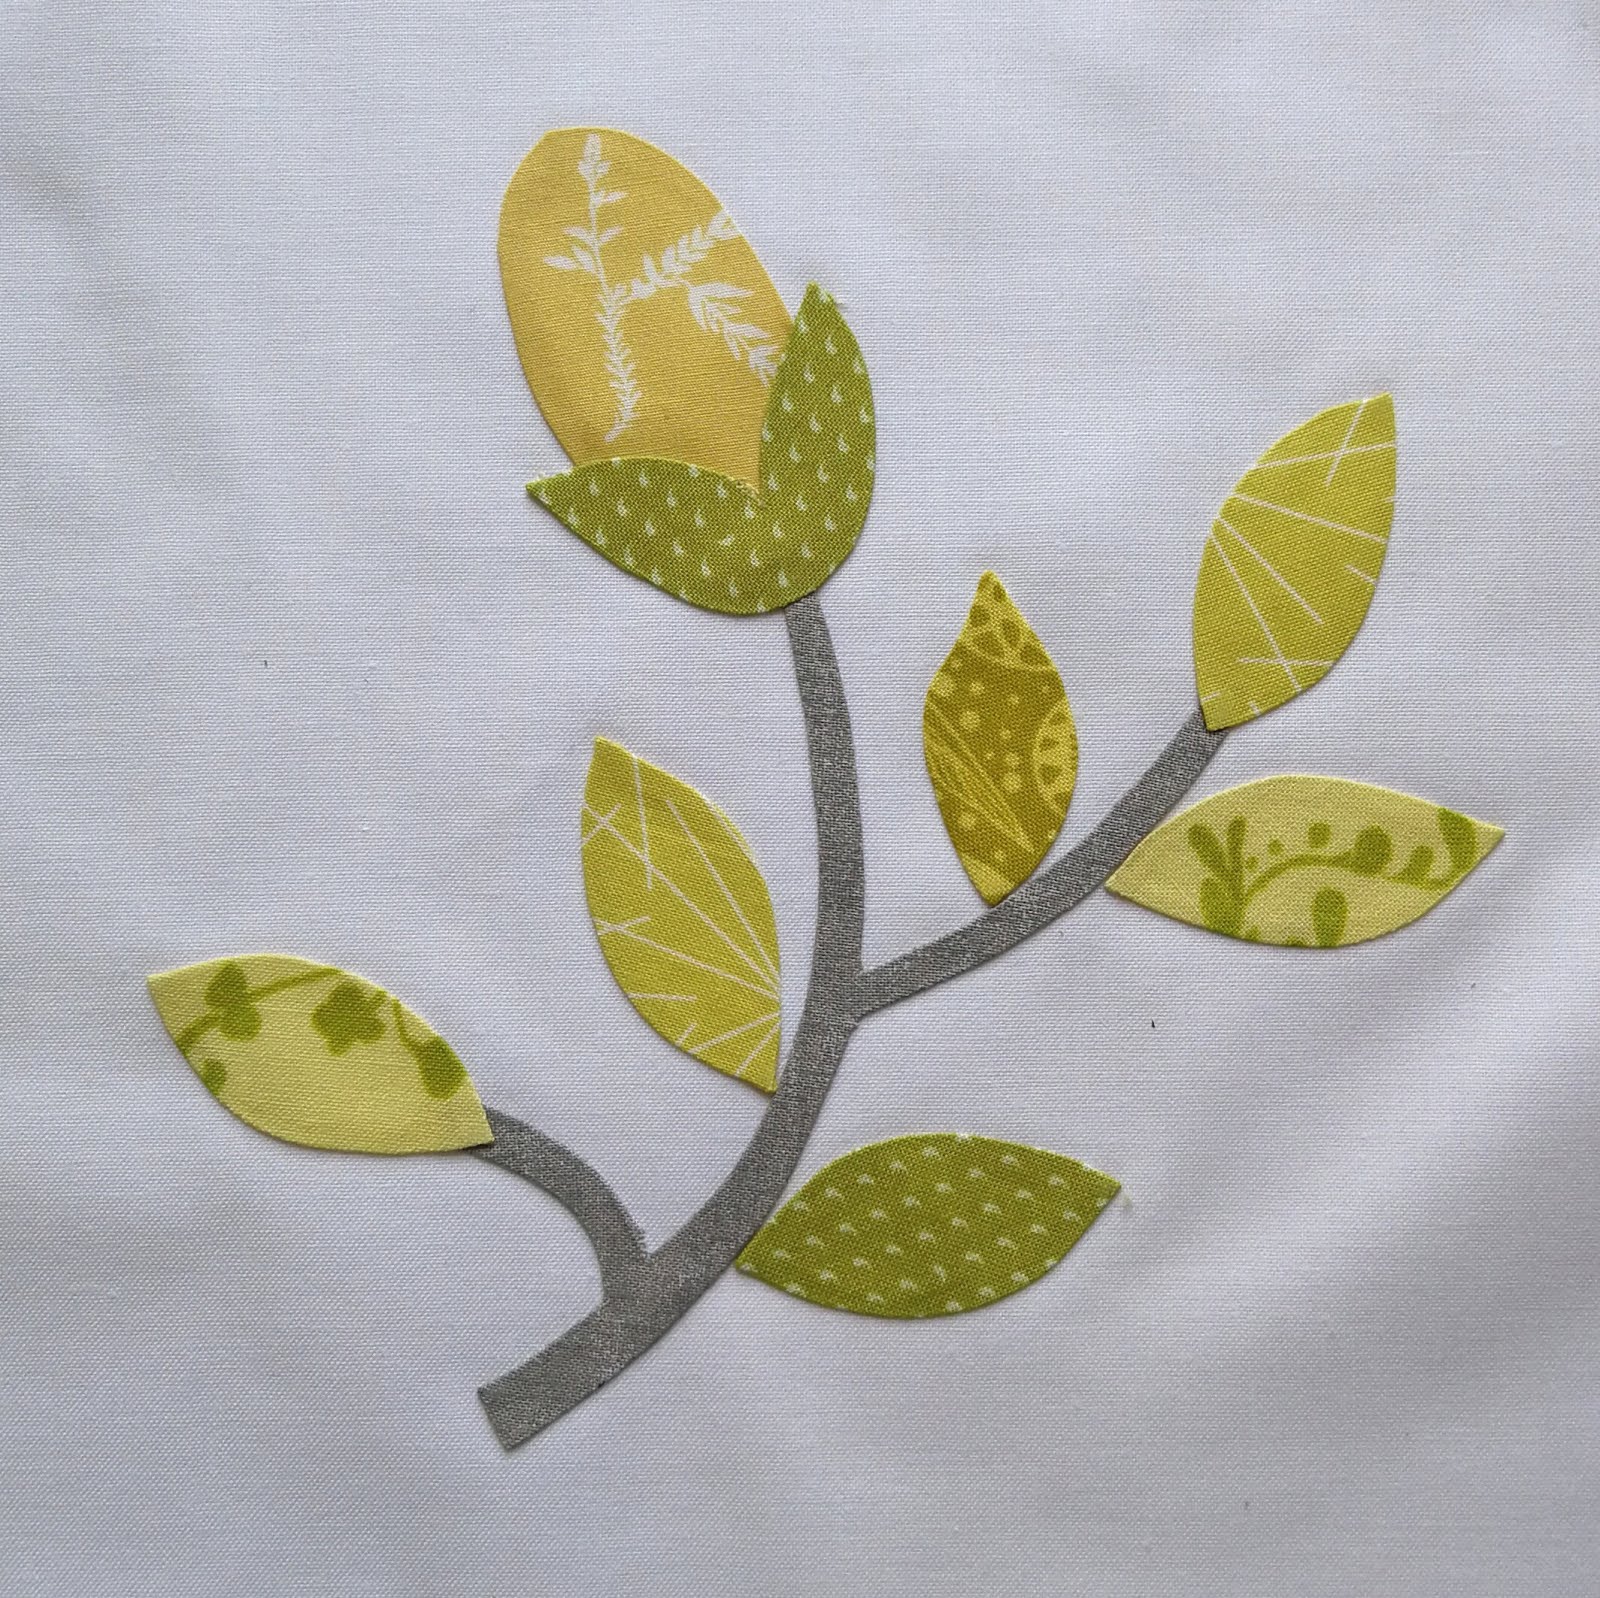
As I had mentioned last week, it is my intention is to keep the applique blocks fairly simple and not get slowed down by such labor intensive blocks... you just can't find any simpler applique shapes than stems, ovals, and orange peels. I've always been really drawn to crossing applique designs.
Here is another Chuck Nohara mix up... I used the stem template, but instead of the multi-pieced flower as in the original, I used simple leaves with a oval accent.
I love the curved crossing stems from this Chuck Nohara block... see if you can spot the original design from my summer garden blocks. No worries, I've not forgotten this project... it's coming back out for summer! It is my travel applique project, and I can't wait to work on it again.
What are you summer sewing plans? Take it with you applique? EPP? or lifting a cold drink as you relax in the garden?
For me it's that time of year again... where I find myself searching, scrambling, debating, back and forthing, all just to find the perfect pattern for my bee blocks... only to be left with that feeling of well, I'm-still-not-sure. I've had it in my head now for a while that I would like to do a yellow quilt (or even green) I love the simplicity of a two color quilt.
One of my biggest back and forth issues is that I want to do a bucket list project... right now on my to-do list are more time intensive or advanced blocks like a double wedding ring, an elaborate applique quilt, or a 100 pieces foundation paper pieced block... and that's not exactly what you throw at fellow bee members.
But I had the idea to do a quilt where I do the applique blocks, and my bee members do the piecing. Usually a more time intensive block utilizes ones bee members a little better, but it just appeals to me to have a simple color palette, with simple applique, combined with simple stars. Here is my original inspiration. So for my first applique block, I modified the leaves a bit on this EQ8 block.
Chuck Nohara blocks are generally a little more labor intensive, and my idea was to keep it simples with leaves and sprigs applique blocks. Even though I've done this block before, I wanted to include it because it's just a few simple pieces.
Here is another block that I found on EQ8, and I've always been drawn to crossing designs. I love the way this Cori Dantini fabric works with the Basic Grey Grunge yellow... I'll be using these a lot throughout this quilt.
What is an applique quilt without including a perched pair on a vine. Here are actually the birds from my Lovebirds Garden pattern, and I simply reduced them in size to fit on this 8" block.
I'm not sure if my colors are too specific, or if these are colors that my members can find in their stash. Who knows, I just might surprise everyone and go a totally different direction... just to keep everyone one their toes...
... kind of makes things more intereting, doesn't it?
I've been so consumed with pattern writing these last weeks, that it feels like there's hardly any time to sew... well, at least not on things that I can share. Since my Lovebirds' Garden is an almost 30 page pattern, perhaps it might make sense why I've been so caught up... that's a lot of T's to cross, and I's to dot!?! With that being said, it's actually been nice for me to sit back, relax, and have others doing my work for me... what do I mean? Well, the blocks from my busy bee members have started coming in for my Summer Smoothie quilt. (tutorial for the block construction found here)
I've added a few
new blocks of my own, first in cool colors, and with Melanie's
#30minssewingdaily #octsewingchallenge on Instagram it's been a good motivation to
get a few more cut and ready to go. I have decided to save stitching
them together until the end of the month at our patchwork group fall
retreat.
I think I am just as excited about some of the new low volume fabrics that I've added to the mix as I am the block itself... library cards, fun text lettering...
... and a new favortie of mine, this cursive writing from Bee in My Bonnet, from Lori Holt. Her new Bee Backgrounds line is just simply fantastic.
I still have
several blocks to go for a finish, and as usual, I'll find out what size it is
when it all gets together. I'm actually thinking something on the small
side... well, at least for me anyway. I had first thought to finish the
on point sashing with something pieced, but have decided to go with
just a simple low volume instead. Hmmm... there's a little figuring to
do.
So, I hit the "send" button this week to get my Lovebirds' Garden pattern to my testers, and then I get to sit back again and watch them do all the work. (wink, wink) ... after that a short breather because, all work and no play, makes this girl a dull quilter.
My quilting bee really is quite a diverse group, and I really appreciate the many facets of the group... there's a German married to an Irish guy, a Swiss in Germany, a Polish girl in Denmark, two German girls who speak English just as fast as I do (if not faster) and then of course there's me... an American in Germany.
The
personal stories of each bee member are just about as diverse as our
tastes in quilting... which is fun to work with combinations that are different than mine. Melanie was the the last quilter who was up, so I'll start with the most recent blocks and work my way back.
Mell's vision for her quilt is a "Good Wishes" quilt... text or symbols in black on a white background. Holy smokes, if you know me then you know that there's hardly a stitch of black in my stash, which is why I had to steal borrow a Kona solid the last time we met for our HH Patchwork Treffen.
She left the method open, and I just HAD to use the starch method for these. She wanted encouraging words/good wishes that one might find in a birthday card, etc. We could use words in another language, but it had to be a language that was relevant to us. "Segen" means "Blessings" in English.
Since
Melanie actually knows both of my boys personally, I thought that she
would enjoy seeing my little assistant hard at work holding her blocks.
Magda is a color genius with a soft palette... quiet and understated, yet a certain unexpected subtle interest. She had requested shades of soft peach and carmel colors, mixed with light colored low volumes... again two colors that stretched me, but a fun color combination nonetheless. I love how her quilt is coming along so far.
Daniela wanted to make a baby quilt for a friend and requested blue's and mustard's and picked a free wonky improv log cabin pattern from Debbie of A Quilter's Table (instruction link here) She has the top together already, and it looks like so much fun... you can see it here.
I usually try impov with a fresh outlook again convincing myself that if I try it again that I might like it again, only to come to the same conclusion as before... improv is just not my thing no matter which way I slice it.
But inspite my total dislike of improv, I do love a good fussy cut block.
So...it's my turn to be queen bee for the months of July/August and I can't wait to see what my fellow bee members come up with for my blocks... here's my start.