Next week the #summerstackfridays Link-Up Party starts... are you ready? The Link-Up will start July 5th and go through August 30th, 2019. But before the fun begins, I thought that it might be helpful to give you a little behind the scenes sneak peek of my process of how I do a fabric pull... you know, it is my favorite part of quilting!

Several years ago I heard the best piece of advice on a home decorating show, and while it is so simple, it is so true... "start with an inspiration piece, and build around it". While I don't always start my fabric pulls with an inspiration fabric, it is definitely a great starting point if you are unsure of where to begin. The inspiration fabric for my stack is this pretty print, "Soma" in avocado, from Monika Forsberg's "Savernke Road" collection from Free Spirit Fabrics (Conservatory Fabrics).

So, you have your inspiration fabric... now what? Sometimes it's helpful to have an idea where to go from this point. Perhaps you've noticed the color/source code that is on the selvedge edge of your fabrics? This is essentially a resource for the manufacturer to reference the colors used in the printing process, but if you are uncertain of yourself when matching fabrics, it could really be a helpful tool.

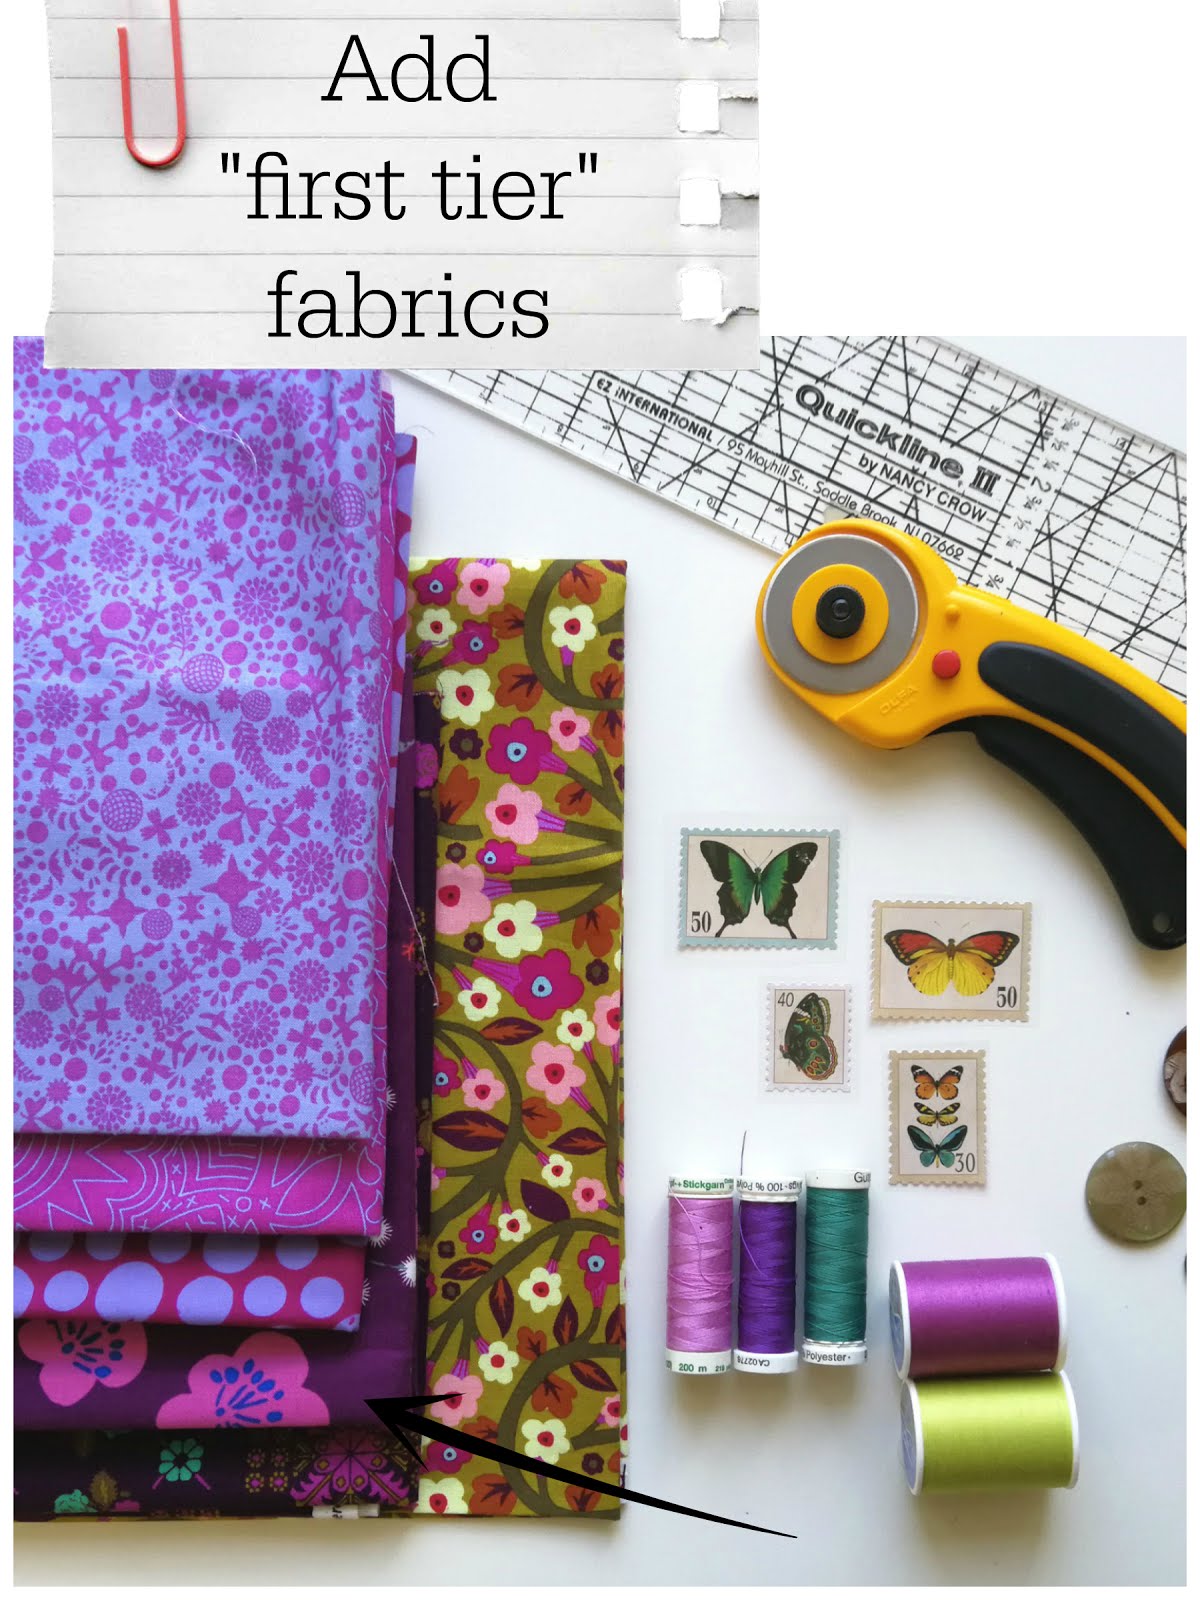
There are several colors that seem pretty "obvious"... so those should be the first fabrics you grab for. Below you will notice that my bottom two fabrics are a pretty good match up to the dark leaves from my inspiration fabric. I would consider these to be "first tier" fabrics. I've purposely chosen two fabrics that have multiple colors in them. The background color is spot on, but there are some additional colors that are being brought in that are not in the inspiration fabric.
When you take a look closer at my original stack, you probably notice that not all of the fabrics match to my inspiration print... so how did they make it in there?!?

This is the point where I start adding what I like to call "connecting fabrics". If you look back to the "first tier" fabrics picture, you'll notice that the bottom three fabrics brought additional colors into the mix that are not in the inspiration fabric. You especially see it with the middle spots fabric -the background matches the brighter pink in the inspiration fabric, but periwinkle is a new color. This means that I am now able to introduce this "new" color, because it "connects" to my first tier fabrics.

One of the biggest mistakes that I see people make when matching fabrics, is that they are not really aware of how colors are made. Do you know what happens to your color when you add white to it? grey? black? Do you know how your color changes when you add one of the primary colors to it? How red is your purple or how blue is it? Are you working with a yellow green or a blue green? Is your orange more yellow or more red? If you don't know these basics, once you start trying to lighten or darken a color, it makes it hard to recognize if you are still in the same "color family". Once you understand how colors are made, it makes matching those specific tints, shades, and tones much easier. With
the fabrics below, what starts out as a yellow, ends up going
a bit greenish when black is added to it, which means that I am still in the same
color family

This is where you start adding what I would call "second tier" fabrics. These might not be as obvious as the first tier fabrics. The top three fabrics are essentially the same background color as my inspiration fabric... they've just been lightened or darkened. Again, I have purposefully added the third fabric because I want to "connect" other colors to it.

Next you can see that I am able to bring in additional colors that are not in the original inspiration fabric because I am connecting to colors in the tier fabrics. The bottom three fabrics connect to the the green leaf on the third fabric. The top green has pinks in it, which work with the other pinks that I've already added, and the middle green repeats the chartreuse yellow that was brought in with the last fabrics. The leaves on the last green fabric connect to the top two fabrics, which means I can bring in colors that may not "match" the inspiration fabric, but as a whole works well together. The last grey fabric that you see on top, has pinks, greens, and yellows, which are just a repeat of some of the other colors used.

So, now it's your turn to get started. Next Friday is the first link-up day, and remember, the link up is about practicing, pushing yourself, documenting, visiting others and helping them out. I've had requests for a theme, so I thought that next week's stack should be "Inspiration Fabric". You don't have to follow the weekly themes, but for some it's helpful to have a little direction... I
I can't wait to see what you stack up!

Thank you. This is a beautiful fabric pull. I believe I have intuitively done this in the past and now love having a more concrete framework around it. Tiers and connectors. This is awesome.
ReplyDeleteThis makes so much sense! I have always relied on bundles created by others. I can't wait to try this during my next store visit!
ReplyDelete