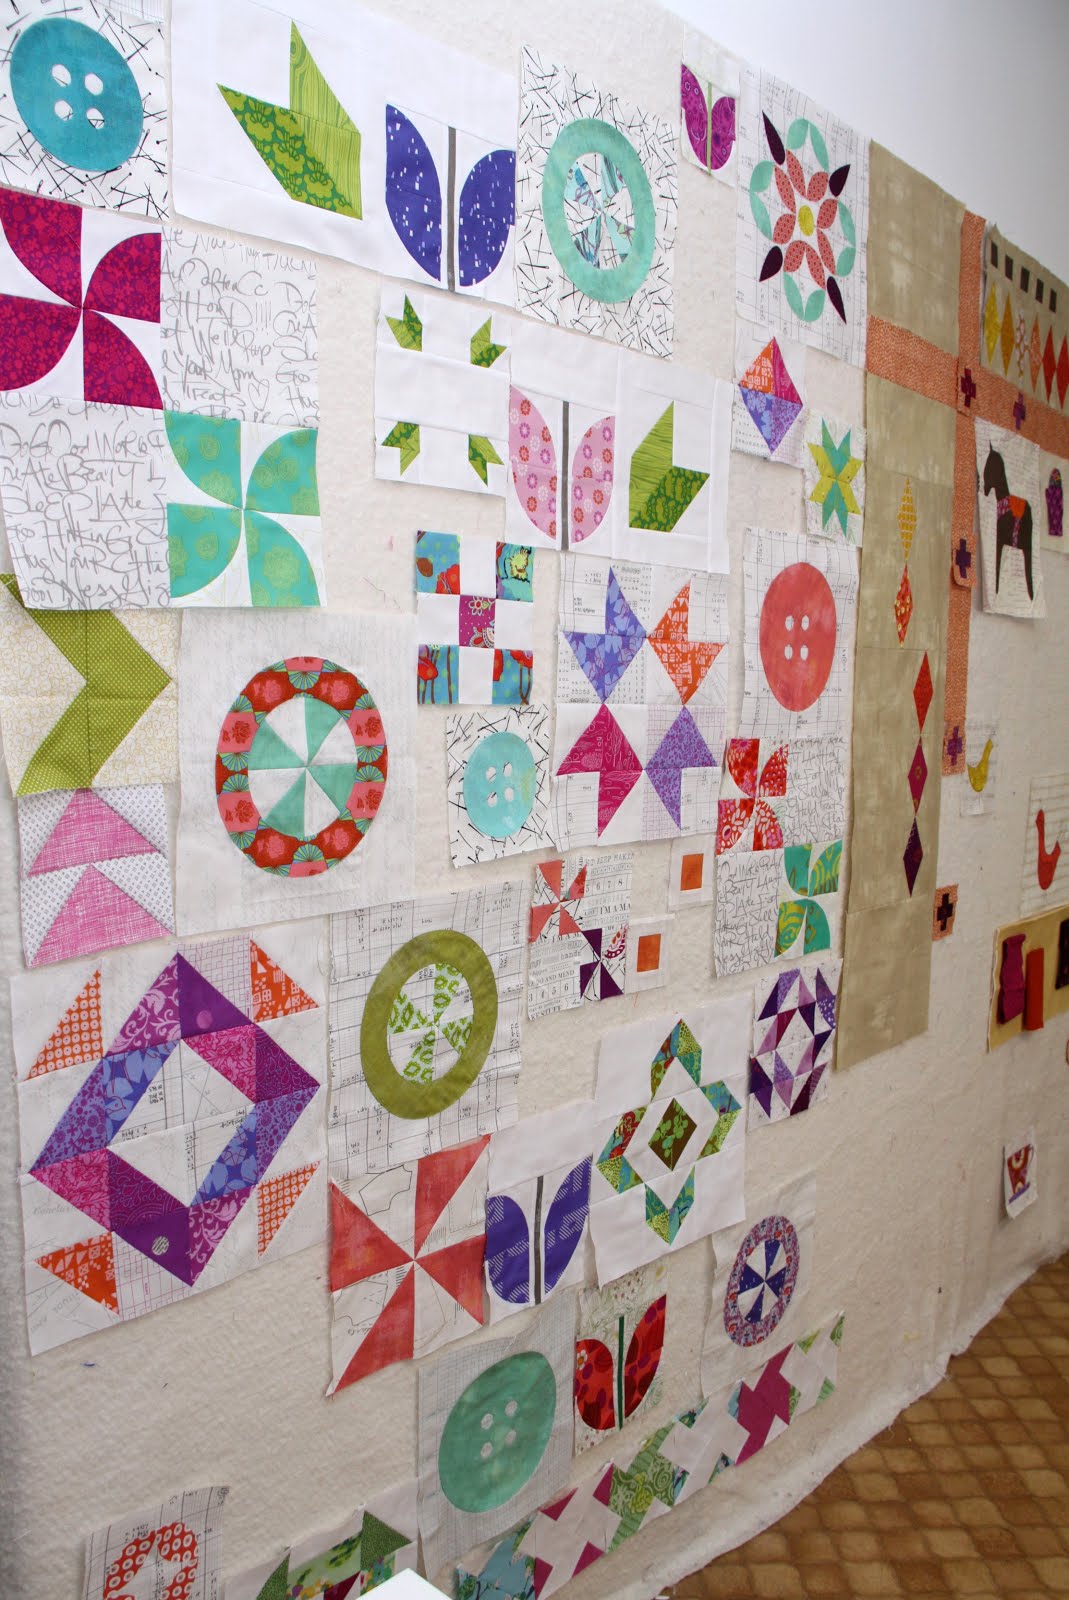
Last week I sent out a "call for help", asking for your two cents on how much time pattern testers might need for an entire medallion quilt instead of a single block or small finished project. Firstly, thank you for all the ideas and suggestions... I've pulled from several of them, and think that this is the planned scenario that I've come up with: Firstly, share the flimsy
and do a pre-call for testers, giving the fabric requirements to see if
the pattern can be made from stash, or if extra fabrics would need to be
purchased. Secondly release my third pattern while the testers are working on the pattern testing this one. Well... that's the plan, anyway.

Currently I am working the last border, which is a little heavy on applique, and should still take a good bit of time to complete. When working on a pattern, I usually sew up the top and then back track, which means that I'm still a good ways out on this one. Realistically, I'm looking at releaseing to testers in late summer/early fall with a spring release for this one.
At our Patchwork Treffen HH this past weekend, amaziningly I didn't do one single stitch on the sewing machine the whole time I was there... I left thinking, why did I even bring it? But some days I simply enjoy playing around with fabric, even if I'm not stitching it. I was able to whip up all these leaves for the border.
Are you interested in pattern testing and have time starting late summer/early fall? Applique experience is needed. Let me know and I'll put you on the list.
Linking up to Let's Bee Social
I've been whittling away and trying to finish two secret sewing projects, both of them new quilt patterns, which leaves me just shy of two finished quilt tops... one more row on the first, and the last border on the second. There's way more done than what I can share right now, but teasers are always such fun, don't you think?
I'm always so back and forth with myself about how much to share before official announcements... perhaps you can help me with that? This is planned to be my fourth quilt pattern, which will be a medallion quilt. My previous pattern testers have usually only done a one block, or smaller pillow/wall hanging project. This quilt will be larger, would need to be a full flimsy finish, and is heavy on applique. What time frame do you think is realistically needed for testers? (interested?... let me know)
My concern that if I share the full quilt too far in advance, and testers need a longer time frame to finish, then the excitement about the quilt has fizzled out by the time it's been tested. I think that realistically this would be a 2018 spring release. (I have to finish the top myself, quilt it, AND finish writing the pattern, not to mention the third pattern that releases ahead of it, but it's good to have a plan, right?)
In addition, I unfortunately I've had to put this to the side because I ran out of fabrics for the last border. The joy of living in Germany is that I will have to wait at least three weeks or more. The missing border is my heavily appliqued border, which should take a good bit of time, but I have started working on some of the applique shapes. I just love these little pomegranate buds. It's not a final design, but still fun to lay them out in a mandala arrangement.
Do you plan a year's worth of projects ahead of time, or do you just take it project by project?
Linking up this week to Let's Bee Social.
Do you have THAT box?... you know, the one with all the orphaned blocks from past quilts?
I've had it in my head for quite some time now to make good use of a few of the blocks that had been packed away in THAT box. I was first inspired to make an orphan block sampler from Julie... I just needed to accumulate enough blocks that didn't make the cut were set aside for their special day. It was actually quite fun to pull them out again and think about what had inspired me to make each one of them in the first place.
You might even recognize a few from some of my previous projects. These first two blocks are actually from my most recent finish... any ideas?
... yup, that's Tiptoe Through The Tulips from my table runner project! Just a little redo to give a whole new makeover to these blocks.
I most certainly don't need to tell you how versatile half square triangles are. Since I was so undecided about my half square triangle quilt, it was nice to play with a few other arrangements that didn't make it in the original quilt.
Remember this finish from last year? My basket project, Modern Beauty table runner? I still had several orange peels left over to make another block.
ahhh... freezer paper, how I love you, let me count the ways. While working on my video tutorial for freezer paper applique, I ended up making several buttons in the process (free template here). These notions are far too fun to be left in the unfinished pile!
While in the middle of my let's-freezer-paper-everything phase (even if it doesn't need to be), I found this fun pinwheel/circle block, and just had to try it.
Even though I am very well
aware of my color tendencies, I have to admit that I was quite surprised about the softness of the colors and the overall feel. The surprise is that it's not my usual popping contrasts that I so often lean towards.
With this quilt, I've tried to either use blocks from previous projects or fabric that was already cut from previous projects. The only newly cut fabric will be the low volumes that I use to connect the blocks. The cherry on the top is that it doesn't take much time for a quilt top to come together!
Linking up to Let's Bee Social
If you follow the bi-annual happenings of quilt market, then you probably remember when the queen of craftiness herself showed up in this feathered frock when she introduced her Field Study fabric line. Oh, how the internet crafting world was all a flurry afterwards with various interpretations of her free feathers quilt project... and all with good reason. The pattern is fantastic!
There are various ways that you can make the pattern, depending on personal quilting preferences. One could use traditional piecing styles, the paper piecing method, or my all time favorite... freezer paper applique. I had fun making this pillow using snippits from Dowry and Pretty Potent, on a Chambray Denim background, and a little hand-stitching to make the feathers pop.
I thought it might be fun to share a few of my favorite projects that I found featuring the fabulous feather pattern:
If you are a little unsure about making the feathers or need inspiration for your projects, you can always join in on Ms. Horner's Creativebug class.
What about you... have you made any feather projects yourself? Leave a link... I'd love to see!
Linking up this week to Let's Bee Social
Sometimes you stumble onto an artist's work that really speaks to you.... as if your heart actually hears something, even though you may not even be able to put it into words what exactly you heard. For me Cori Dantini is one of those artists. And as if it weren't enough to have her work featured all throughout my whole entire house, what's more than exciting to me is that Cori puts her brilliant little pieces of art onto my medium of choice... fabric, swoon... and then comes the best part, getting the chance to create something fun with it!
Her latest fabric collection "The Makers" series holds a special place in my heart, especially since it covers a certain theme that is near and dear to me...
I had to sneak a sweet little freezer paper gift tag in there somewhere just for fun...
Sewing Techniques: Simple piecing. Window - paper pieced, girl - freezer paper applique or alternative raw edge applique.
Fabrics: Cori Dantini "The Makers", Art Gallery: "Makers", Penquin & Fish.
House: Depot (Germany)
Paint Finish: acrylic/sand paper, decoupage
.... and because everyone needs friends:
I've had this sweet little miniature set that I had gotten from a friend a while back, and I've been waiting for just the right spot to feature these tiny little notions... I think they've found their new home, don't you?
Sewing Techniques: simple patchwork background, girl - freezer paper applique or alternative raw edge applique.
Fabrics: Cori Dantini "The Makers", various scraps from stash
House: Depot (Germany)
Paint Finish: acrylic/sand paper, decoupage
.... are you a maker too?
I've never been a beach girl... sweating in the hot sun, sand in the most uncomfortable place in your bathing suit, sticky from all the sun block lotion, forced to just lay and relax with nothing to do... it's almost pure torture for me, not to mention there's no outlet to plug in a sewing machine! (yes, give me crafting instead of a book ANY day!)
Even though I can't always get to my sewing machine, I still very much enjoy hand sewing projects that can be transported from place to place... the couch, done while driving in the car, on vacations, and yes, even at the beach! And since I joined a local club that hosts a bi-weekly crafting group, it is necessary to have a good little number of those fun little hand stitching projects already packed up... crafting on the go!
Despite my need to craft on the go, ironically I'm not a needle turn applique girl and the thought of English paper piecing is just as unpleasant as sitting on the beach! (see above) But I always have my little crafting basket packed up, ready and waiting with those backburner projects that you have in the works for quite a while, like sweet and small applique butterflies...
...peeling the paper off the back of your paper pieced blocks...
....stacks of freezer paper hexies...
So, is it pretty obvious that I'm so totally crushing like a love-struck school girl on the new Alison Glass fabrics?!? With a fun little stack of strips like this, you can take them anywhere, pet them, lay them out in pretty rainbows, and put them back again to google them later.
All these WIP'S aren't quite ready for their time in the limelight just yet, as they will still be on the back burner for a bit... but linking up anyway to WIP Wednesday.
I figured that it was time that I share another tutorial, so as promised, here is the step-by-step tutorial for my "Buttoned-Up" pillow that I shared last week (scroll down for my video of these first steps!):
Download the "Buttoned-Up" template here making sure to print out to actual size. Finished button should measure ca. 7 3/4 inch (ca. 19.5cm) in width. Trace onto freezer paper and cut (4) templates. Cut out the inner circles as well. Place the shiny/slick side of the freezer paper on the wrong side of the fabric and lightly iron onto fabric. Cut around the template approximately 1/4 inch (ca. 1 cm) from the edge of the template.
For the center circles cut small slits towards edge of the small circle being careful not to cut into the freezer paper. For this I actually cut 6 slits that ended up looking like little flowers in the center of the circle.
For the outer edge of the circle, cut slits toward the temple approximately every 1/2 - 3/4 inch, also being careful to not cut into the freezer paper.
Using a glue stick, run a small stripe of glue to cover the inner edge of the small circles.
I usually use a pair of pointed scissors as a turning tool as I secure the fabric to the back of the freezer paper template. You can of course use your fingers or another tool that you are most comfortable with.
Repeat the same steps on the outer edge of the button template, gluing the fabric inward on the template.
Here's a video that I did to show the whole process in action:
For the background of the pillow I sewed 4 - 11 x 11 inch (ca. 28 x 28) squares together and ironed seams open. Position the (4) buttons in each individual square one inch from the seam as shown. (Quilting will come later, I realized only after the fact that I didn't have an unquilted photo to show the button placement)
Stitch buttons in place as close to the edge as possible using invisible thread. You can use either a straight stitch or a blind stitch. I have an Bernina Activia 240 and use setting #43 when finishing with this option.
Once the buttons have been stitched in place, flip your pillow over to the backside and cut out the inner circle approximately 1/4 inch (ca. 1 cm) from the stitch line. Also cut around the inner circles of the button.
Using a damp cloth, slightly moisten the stitch lines. It's important to not over soak the piece.
At this point you can gently begin to remove the freezer paper from the backside. Also remove the freezer paper from around the inner circles.
Quilt as desired and add decorative stitches as desired. For my finished
pillow I quilted the upper left and lower right squares vertically, and
the upper right and lower left horizontally. Once finished quilting, trim to ca. 20 x 20 (ca. 50 x 50) square. I actually trim to the actual size of my pillow and do not include a seam allowance. This makes the finished pillow very full and fluffy since the stuffing looses volume after some use. Additionally, I finished the pillow back with G700 interfacing (German product equivalent to SF-101) and simple envelope closure.
Have fun sewing!