Applique takes time, and sometimes the pressure of the social media world of "I must post daily inspiration", never takes into consideration that slow stitching is supposed to be just that... slow.
Block 463
When you see me pull my Chuck Nohara blocks out, then you know that it is vacation time, or I am at least at a point I am slowing down. Since I was away from my sewing machine for the whole summer, I had to at least have a little something around for my itching fingers.
Block 620
The last time I posted any real progress on my Summer Garden project was last year... and let me just say that this is not a project that I plan to finish any time soon. My aunt, who is a seasoned quilter, is always reminding me that it's not about turning out one quilt after the other, as quickly as possible, but about enjoying the process... a good reminder for all of us, don't you think?
Block 696
But I am actually ok with my snails pace progress... and have no apologies for taking it slow. Even a garden never grows overnight, and those stop and smell the roses moments make it worth it.
Block 602
Somehow, every time I think about my Summer Garden project, the nursery rhyme from Mother Goose always comes to mind... Mary, Mary, quite contrary How does your garden grow? With silver bells and cockleshells And pretty maids all in a row.
Wanna slow stitch with me and are in the Hamburg area? Then be sure to check out my previous post because I will be teaching a starch applique class.
Are you in the Hamburg area and would like to learn more about the
starch applique method? Then, mark your calendar because I will be
teaching a two day class (in German, of course) at Patch-Yard, September 29th & 30th!
We'll start out with a couple basic shapes to make a simple applique block. Simple shapes are often the foundation for creating more complex blocks.
... and it wouldn't be a starch applique class unless I shared my Top 10 Tips. There's so much more to share than what I can pack into one blog post.
All my patterns will be available in print, including my mini Home Sweet Home applique sets...
You can find out more
details, and register for the class on the Patch-Yard website, as well as find some of my favorite applique notions. There is limited space, so be sure to get in touch with her
now. Hope to see you there!
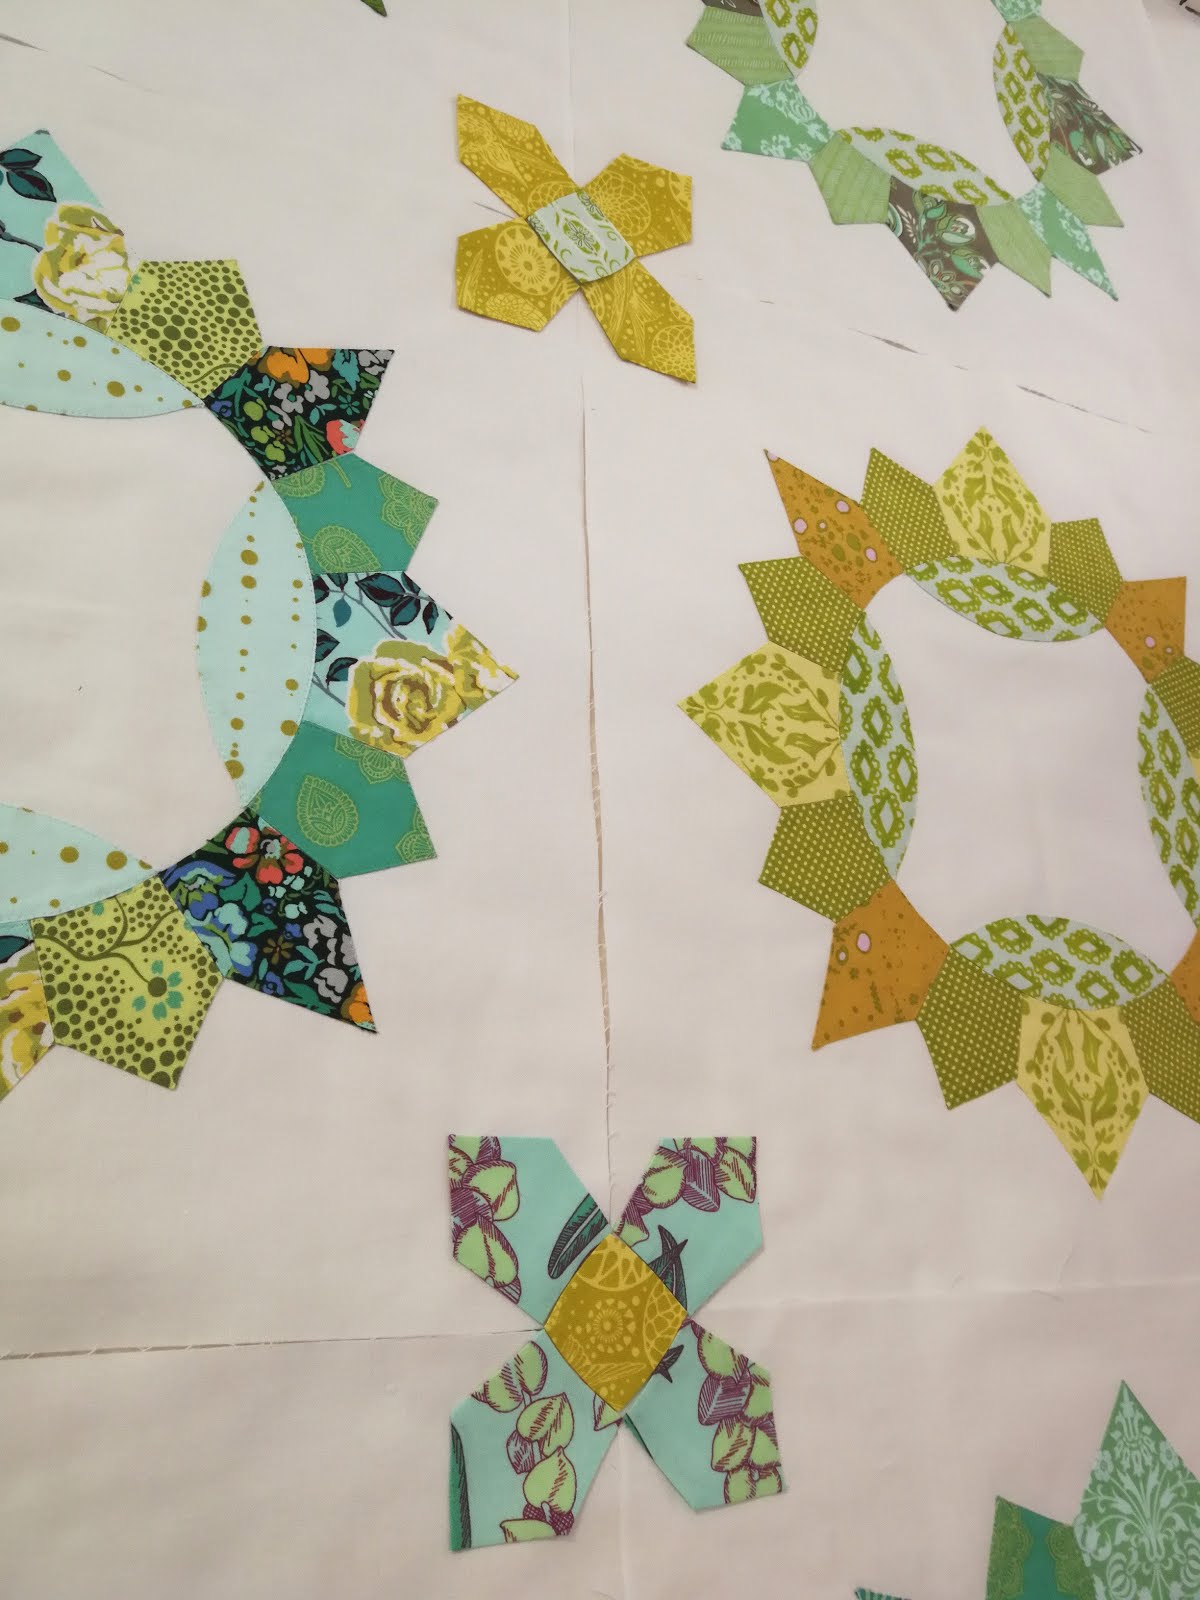
Do you sometimes struggle after you have all your quilt blocks finished to find a way to connect it all? Well, I have three projects in the works right now where that just happens to be the case. Sashing is the most obvious answer, and with good reason... it's simple and doesn't overwhelm a project. But then sometimes a project needs a little more than just simple.
I was over the moon excited when I stumbled on @janemichelquilts post and saw how she put her Brimfield blocks together. Just a step above simple, yet obvious enough to be annoyed with yourself that you didn't think of it first.
It was pure brilliance to take the small houses block, add a simple center, and then it transitions into the perfect flower cornerstone!?! Once
I figure out the exact direction of a project, it seems to push it
along a little faster.
This is the third "green quilt" that I have in the making, and yet I would like each of them to have a different feel. For this quilt I've pulled in some patina green, and pale aquas, while my yellow stars applique quilt is more yellows and chartreuse green. But they are all planned for the same room, so there should be enough to still tie them to each other.
... but since I still have two other quilts to figure out how to connect, I would love to hear your favorite way to connect quilt blocks. Sashing, or something entirely different?
Wait for it... are you ready? Did you happen to notice the small, little quilt below? Believe it or not, it actually happens to be my smallest quilt to date!?!
Perhaps, a small quilt may not seem like a very big deal for you, but it kinda is for me. I'm a go big or go home kind of gal, and quilts are no exception. Time and time again, my quilts have grown bigger than expected, and I even have a few friends who tease me about it. I suppose it has to do with the fact that I don't want to make quilts that would leave my toes cold.
But, what this 46" inch long quilt lacks in size, it makes up for it in quilting... another to-date piece of info is that this is also my most densely quilted quilt. I ended up echoing many of the shapes, and did simple straight line quilting for the background, turning at unexpected angles for interest.
I opted for a simple black and white binding from Carolyn Friedlander. While I really loved the red and white fabric that was in the running, and it matched perfectly theme-wise. I usually tend towards a more subtle binding, or perhaps a binding that you don't really notice because I don't want to take away from the star of the show.
... and of course, that 30" basic grey grunge deliciousness takes the show.
Quilt: Pattern: "A" Is For Apple, self design Started: May 2018 Fabrics: Basic Grey Grunge fabrics, Kona cotton white Finished quilt size: ca. 42" x 46" in. (ca. 106 x 116 cm)
It was not my intention to be MIA for so long. Good intentions are sometimes just that... which is why my summer vacation whisked me away without so much as a peep. Traveling for long periods of time and blogging don't exactly fit together, not to mention lugging sewing supplies here and there... (although I did a little of that too)
... so I'm back from my vacation, and it looks like I have a lot of cacthing up to do. I had planned my Zen Chic Contrasting quilt as a present for my parents to match these pillows, and had a deadline to get it finished before I flew in. There was a point when I thought I might have to bind it once I got in. Luckily I was able finish it and snap a few pictures before I left, but didn't have enough time to share them here... and then the laziness and business of summer set in.
I used the different meeting points in the quilt for my quilting lines, and it seemed natural to keep this with simple straight line quilting. Like my Facing East quilt, I varied the widths of the lines for interest, and if I'm being completely honest... it gets done faster than if I had quilted them all the same width.
... and what else would you expect, but a pieced back? I suppose that it's turning into my trademark. Sometimes it does feel a little like making a second quilt top, but I like putting those leftover bits to good use.
... are you somehow hearing the song "Fields of Gold" in your mind about now? I loved shooting a few pictures in these wheat fields. Hmmm... it makes me think that I should plan all my quilts to match whatever is blooming in the fields outside.
Stay tuned for a few more catch up posts... so, how was your summer?
Quilt: Pattern: Contrasting from Brigitte Heitland for Zen Chic Started: May 2018 Fabrics: Basic Grey Grunge fabrics Finished quilt size: ca. 57" x 65" in. (ca. 145 x 165 cm)
So, if an apple a day keeps the doctor away, does a really BIG one keep him away fore even longer? I've shared a
couple sneak peaks of my latest Basic Grey grunge yumminess here and on Instagram,
but perhaps it wasn't really obvious what those bold splashes of red
would become.
I was totally inspired by a Clare Young's print, and I find that when I look at almost everything these days, I just see applique shapes. I have to admit that her pear print makes me want to tear into my green grunge stash too.
For my standards, this is a pretty small quilt, probably a baby quilt size, but it also boasts my largest applique shape to date... that's an almost a 30" apple there!?!
Because of all the million appointments that one has to push through the end of the school year, I will have to bind this after the kids are finished. I'm a little back and forth on which binding, and would love your two cents... on one hand I like the red and white fabric because it connects to the red in the quilt, not to mention that the cursive letters reminds me of school, and the days where students would take an apple to their favorite teacher. The other black and white fabric is more subtle and let's the apple shine instead of the binding.
But, summer time is my applique time. I've gotten a couple of star blocks already from one of my bee members. You can see how it's grown already... I'm ready to let it grow some more.
In any case, I wish everyone a relaxed start into the summer season.
I have to admit that I am a little all over the place with my projects these days. I know that things are winding down because summer is just around the corner... that time of year where there is less time for sewing, and more time for kids, outside activities, family, friends, traveling, and cookouts! (surely a little applique has to be on that list somewhere too!?!)
And that leaves me with lots to do and little time to do it. This past week, I basted two quilts, started quilting two projects, AND worked on several new videos... just to mention a few.
So, if you happened to miss it last week, then be sure to hop over to my YouTube channel. I've been talking about my favorite thing, what else... the starch applique method! There are more videos to come, but since I've got a lot to say about this technique, I just couldn't get it all in at once! I just added an introduction to freezer paper (my favorite quilting must-have, below) and using freezer paper for starch applique videos.
I would love your feedback about what you would like to see more of, but today I'm keeping it short and sweet today because this week's motto for me is: a little less talk, and a lot more action.
I've been talking about it for a while now, that I wanted to start making a few videos about some of the quilting techniques that I use... especially about starch applique. There's just so much to say, that you just can't get it all in on one blog post... not to mention that having a visual explanation of something just makes things so much more clear. So, pop on over to my YouTube channel and see what I've been up to...
Stay tuned, because I've got more vidoes in the making... do you want to see more?
Some of my bee members like to make fun of me that by the time I deicde on a quilt block, and make up a couple test blocks, that the quilt is almost finished. Well... not quite. Yes, I've made a good amount of progress on my yellow quilt, but am no where near being finished. My bee members will be pleased to know that I am stopping with stars now, and passing the torch for them to carry.
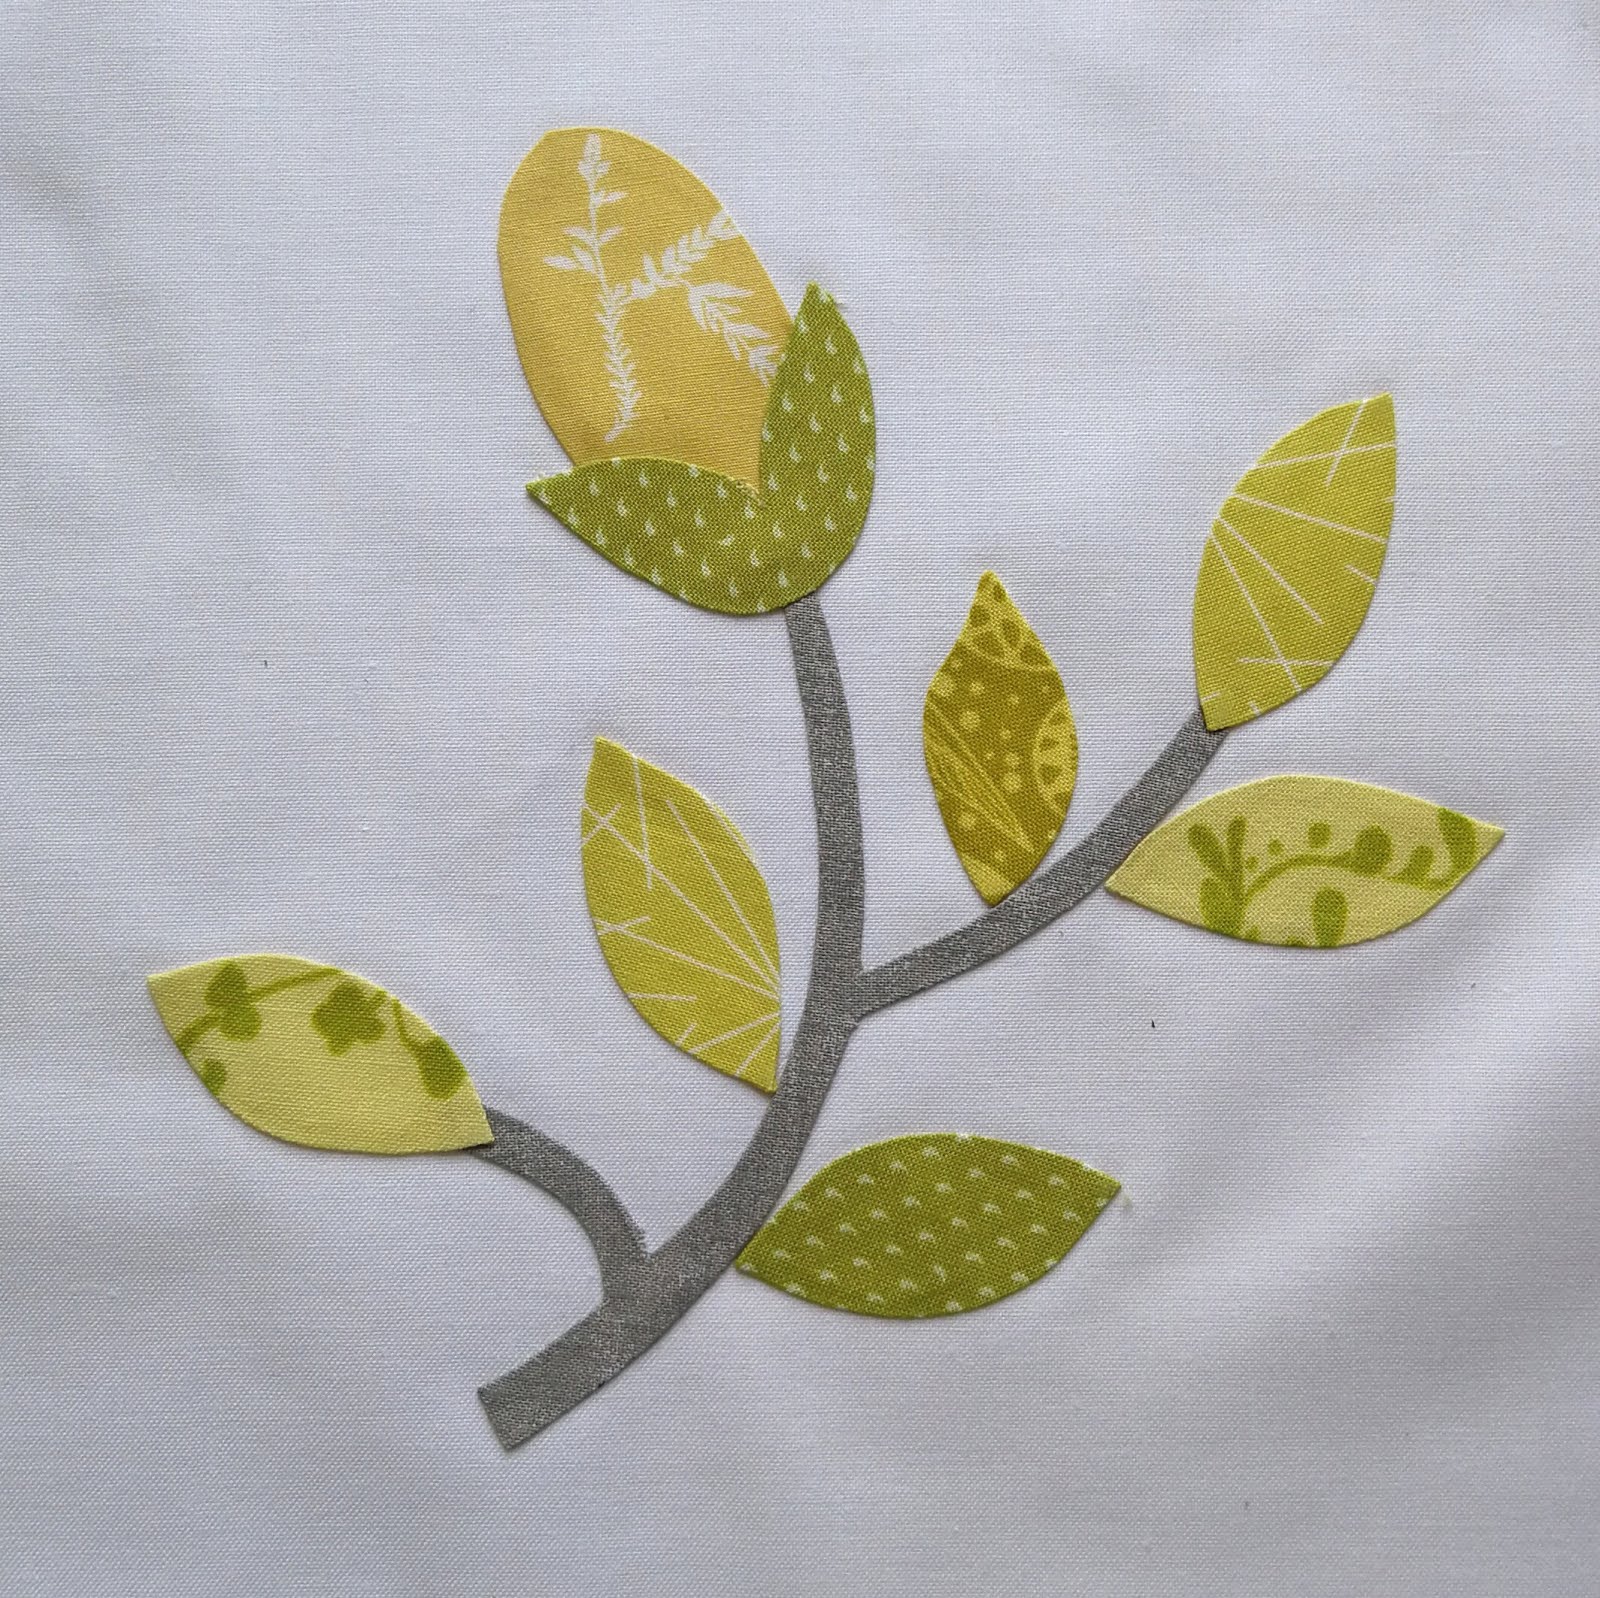
As I had mentioned last week, it is my intention is to keep the applique blocks fairly simple and not get slowed down by such labor intensive blocks... you just can't find any simpler applique shapes than stems, ovals, and orange peels. I've always been really drawn to crossing applique designs.
Here is another Chuck Nohara mix up... I used the stem template, but instead of the multi-pieced flower as in the original, I used simple leaves with a oval accent.
I love the curved crossing stems from this Chuck Nohara block... see if you can spot the original design from my summer garden blocks. No worries, I've not forgotten this project... it's coming back out for summer! It is my travel applique project, and I can't wait to work on it again.
What are you summer sewing plans? Take it with you applique? EPP? or lifting a cold drink as you relax in the garden?


